How to Build a PC: A Beginner’s Step-by-Step Guide
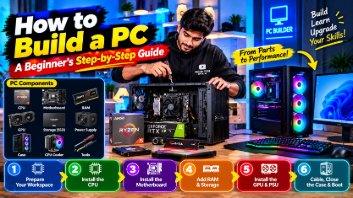
Building your own PC sounds intimidating, but it’s honestly adult LEGO — everything only fits where it’s supposed to go. You get better performance per dollar than any prebuilt, you learn how your machine works, and upgrading later becomes trivial. Here’s how to build a PC as a complete beginner, from picking parts to the first boot.
Step 1: Choose Your Parts (Compatibility First)
The parts you need: CPU (the brain), motherboard (everything plugs into it), RAM (16GB is the sweet spot in 2026), storage (an NVMe SSD — non-negotiable), graphics card/GPU (skip if you’re not gaming or doing heavy creative work; modern CPUs have decent integrated graphics), power supply/PSU (never cheap out here), case, and a CPU cooler (many CPUs include one).
The golden rule: use PCPartPicker — it automatically flags incompatible parts and finds the best prices. The most common beginner mistake is a CPU that doesn’t match the motherboard socket. Let the compatibility checker do the worrying.
Step 2: Prepare Your Workspace
You need a large clear table, good lighting, and a Phillips-head screwdriver. Build on a non-carpeted floor if possible to reduce static (modern parts are tougher than the old warnings suggest, but touch your case metal periodically to ground yourself). Keep every manual handy — especially the motherboard manual.
Step 3: Install CPU, RAM, and SSD on the Motherboard First
Do this before the motherboard goes in the case — it’s much easier. Lift the CPU socket lever, align the triangle markers, and gently drop the CPU in (zero force needed — if it resists, it’s misaligned). Close the lever. Install RAM in the correct slots (check the manual — usually slots 2 and 4 for two sticks) until the clips snap. Screw in the NVMe SSD at an angle and secure it.
Step 4: Mount the Motherboard and Connect Power
Install the I/O shield in the case, lower the motherboard onto the standoffs, and screw it in. Connect the big 24-pin power cable and the 8-pin CPU power cable from the PSU. These only fit one way — firm, even pressure until they click.
Step 5: Install the GPU and Storage Drives
Remove the appropriate case slot covers, push the graphics card firmly into the top PCIe x16 slot until it clicks, and connect its power cables. Mount any SATA SSDs/HDDs in the drive bays and connect data + power cables.
Step 6: Cable Management and First Boot
Route cables behind the motherboard tray for airflow (it doesn’t need to be pretty, just not blocking fans). Connect the monitor to the graphics card (not the motherboard!), plug in the keyboard, and press power. If fans spin and you see the BIOS screen — congratulations, you built a PC.
Step 7: Install Windows and Drivers
Boot from a Windows USB installer, install Windows, then install drivers: chipset first (from the motherboard maker’s site), then GPU drivers (NVIDIA/AMD), then everything else. Run Windows Update until it’s fully caught up.
Troubleshooting: It Won’t Boot
Don’t panic — 90% of first-boot failures are simple: RAM not fully seated (re-seat it), power cables not clicked in, monitor plugged into the motherboard instead of the GPU, or the PSU switch on the back is off. Check these four and you’ll almost always find it. For more PC guides, visit our tutorials section.